Note: The original of this website is no longer online. I got it from www.archive.org. So some of the links probably don't work. I tried to leave it original as far as possible, but I switched text and background colors for better readability. And I added some comments (in red) where I thought they are necessary. The original website is from Jason Vanderhill. How to Recycle the Konica Film-In Panorama.
You've probably thought to yourself, "I wonder if it's possible to reuse this disposable camera?" Actually, the camera manufacturers would rather you didn't call them disposable. 'Single-use' is the slightly more politically correct term they'd prefer (the cameras are supposed to be returned to photo labs all over the world for recycling). But to the mass market, they will always be disposable. To a select few, however, they can be recycled for use over and over again.
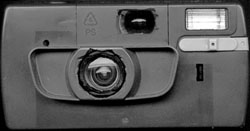
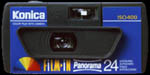
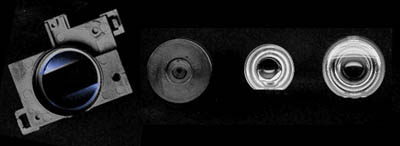
Here's what the 24mm Konica Panoramic looks like, with its lens hood retained. It's worth recycling this camera because of its sharp 24mm lens, but it is a bit bulkier than the 17, and doesn't have the distinctive vignetting of the 17. Still, it's an excellent wide-angle disposable camera with a flash! Now, prepare to start recycling... Step 1: |
| Step 2:
With the trap door open and the film removed, start to pry the back of the camera off as shown above. (Use a small screwdriver, not a pair of scissors as shown above!) There are two plastic "retention clips" on the bottom and three "retention hooks" on the top holding the camera back in place. The hooks on the top are harder to unhook without breaking, so be careful. Try not to break the hook closest to the film advance; this causes the film advance wheel to slip backwards when trying to advance the film. Even if you break one or two of them, you can use clear packing tape to keep the camera body together well enough. |
| Step 3:
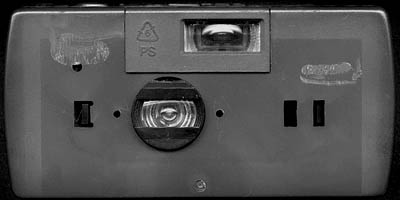
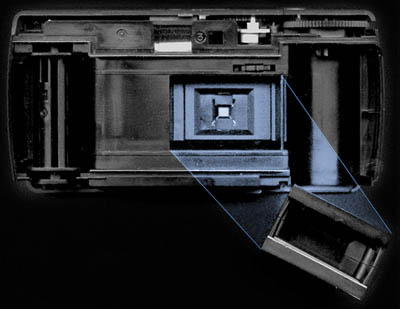
With the back of the film off, you'll see you need to remove the panoramic mask on the inside of the camera; pry it out with a screwdriver. That's the first step to converting the camera to a full-frame 17mm camera. Course, you can leave it there and keep shooting panoramic, because that's basically all you'll ever see in the viewfinder. But if you want a wide-angle, you also have to carve away the plastic at the front of the lens. Note: It's not that easy. I also tried to pry the mask out with a screwdriver, but it's kept in place with two plastic hooks. I didn't want to damage the camera, so I removed the lens assembly and the shutter to unhook the mask. See my German description for details. Note: I originally tried enlarging the viewfinder too, but eventually I gave up even using the viewfinder because basically, I could rest assured it would photograph everything between my peripheral vision. The viewfinder will really only show you a panoramic view of what your full-frame image will contain. It would be cooler if the viewfinder was a true representation of your frame, but it's just something you have to live with. |
| Step 4:
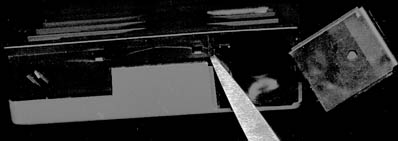
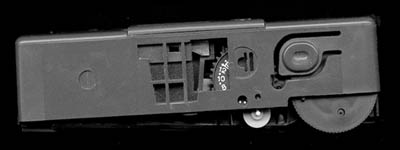
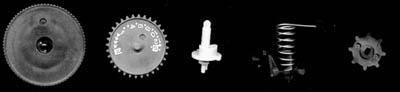
Removing the panoramic mask from the front of the lens is the next task, and it is the most involved procedure. It could take some time, and will require careful attention to small parts. You need to take the front of the camera off, and then you get to dismantle the lens housing. First, pry the front cover up and over the frame indicator dial as shown above. Using a screwdriver can help. There are also two plastic hooks that hold the front of the camera in place. The holes in the front of the camera might give you a few clues on how to un-pry them. Once again, using a screwdriver can help. With the front of the camera removed, you should be able to account for all the parts below:
|
| Step 5:
Next, remove the lens housing as shown below. This step is a bit tricky, and somewhat dangerous, as the two plastic hooks that hold it in place cannot be broken. Use a small screwdriver again to help unhook them. Taking the lens housing off also reveals the shutter and spring; careful you don't lose those either. |
| Step 6:
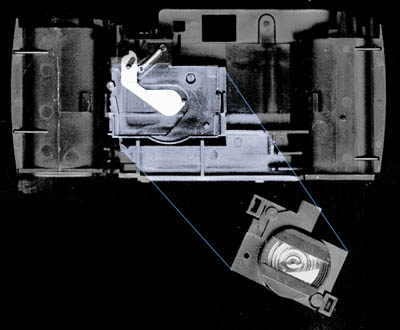
Next, you actually have to pop the lens out of it's housing. Use a soft cloth to push the front of the lens straight out the back. It should pop out nicely. See pieces below. The lens is made of two pieces of plastic--pretty cool actually. Use an exacto knife to carve away the panoramic mask at the front of the camera, as highlighted in blue below. This is tedious as you have to carve it away slowly; the plastic is a bit too thick to be removed in a few slices. Careful not to cut yourself either! |
| Step 7:
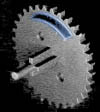
Once you've shaved the lens housing more or less completely round, you need to start putting everything back together! There is one more modification you can make if you'd like. The frame number indicator dial can be modified so that it doesn't stop advancing after 12 or 17 exposures. You can make your camera shoot up to 36 exposures by shaving off the protrusion (shown in blue below) on the under side of the frame indicator dial. This is helpful because when you reload film, you're often not really sure how many frames you have left, and so you're better off shooting till the film runs completely out.
|
| So, you've reached the end of the disassembly instructions! Hooray! Hopefully, some of them were helpful, if they weren't too obvious already. Now work your way backwards and you should have a complete reassembled camera!
Don't forget the film! But before you put the back of the camera on, you'll need to prepare to reload it with film (in total darkness remember). I recommend sticking with your 400 ASA C-41 film of choice. You can use 800-3200 ASA if you think you'll be in lower than typical daylight, but your results will likely be less impressive. This camera does its best outdoors, in broad daylight. I also shot with Portra160 on a bright summers day, and I even shot a lot of slides (Ektachrome 100 specifically, thanks to one bulk roll from Ted Knude and one bulk roll from Milos Mali!). I had the lab push it one-two stops, depending on how bright of a day it was. The results were often surprisingly good. I also usually just loaded half a roll of 36 because a full roll with 36 exposures is too hard to wind up in the take-up spool. If you aren't familiar with rolling your own film in a dark room, don't attempt to load more than a roll of 24 exposures. Note: it's no problem getting a roll of 36 in the camera! But then you MUST modify the frame number indicator dial. To actually reload the camera, you need to spool all the unexposed film in the take-up spool. Because this has to be done in total darkness, you might want to practice loading the camera in daylight with bogus film, just to get used to the process. Once it's all back together loaded with film and with the trap door back on, you can wrap clear packing tape around the whole body of the camera to keep everything together, and to keep dust etc out of the camera. You can cover up the little holes on the front of the camera with tape too... |
| Shooting Tips: |
|